En ocasiones queremos compartir a través de Internet cientos ó miles de fotografías con amigos ó familiares y no sabemos cuál es la mejor forma. Hoy os voy a explicar como crear una galería de fotografías en HTML de una forma muy rápida, sin dificultad alguna y así poder compartirla a través de Internet. Esta opción permite que las personas vean previamente un wallpaper con todas las miniaturas de las imágenes y posteriormente descargar únicamente las que les interese, ahorrando tiempo y espacio.

⬇️ Compra en Amazon el hardware que utilizo ⬇️
- 💻 Ordenador Portátil: Descúbrelo aquí
- 🖥️🖥️ Monitores: Mis 2 súper monitores
- ⌨️ Teclado: Mini teclado + Lector DNIe
- 🖱️ Ratón: Mi ratón programable
- 🎧 Auriculares: Súper Auriculares TOP!
- 🖨️ Impresora: Mi fantástica impresora
- 🗄️ NAS Backup: Mi NAS para Backups
- 🔌 HUB USB: Mi HUB para puertos USB
- 📱 Smartphone: Mi Smartphone
- 📲 Tablet: Mi tablet para viajes
- ⌚ Smartwatch: Mi Smartwatch favorito
- 📹 Cámara deportiva: Mi cámara para deportes
La forma más sencilla de pasarle las fotos a un amigo o familiar, y simplemente pasarle todos los ficheros JPG y olvidarnos, pero...¿que sucede si son 10GB de fotos con miles de fotos y la persona que recibe las fotos quiere hacer una selección? Una de las formas de hacerlo es a través de galerías de fotografías y compartirlas con los demás. Usaremos 3 programas diferentes pero muy similares: album, photon y bins.
Para este tutorial usaré unas 160 fotografías las cuales incluiré en una galería de fotografías para poder visualizarlas en diferentes páginas y calidades:
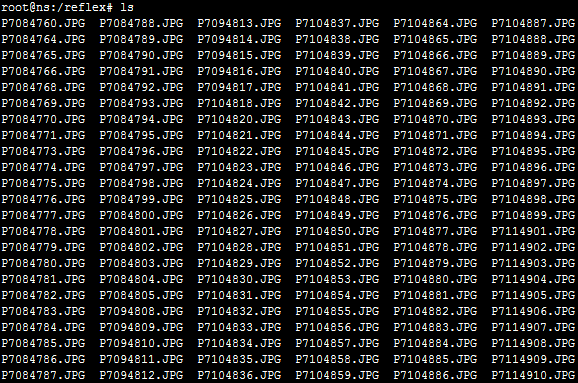 Listado de fotografías
Cualquier duda que tengáis, escribidme en los comentarios de abajo del artículo. Espero que os guste!
1.- ELEMENTOS UTILIZADOS EN ESTE TUTORIAL
- GNU/Linux Debian 8 64bits + 3 programas ( ALBUM, PHOTON y BINS )
2.- INSTALACIÓN DE ALBUM
Este paquete se encuentra en la rama non-free del repositorio oficial de GNU/Linux Debian y funciona en modo consola, por tanto no necesitas tener un servidor X-Window instalado ;) . Si no tienes añadida la rama non-free en tu fichero sources.list (/etc/apt/sources.list) deberás añadir dicha rama al repositorio como se ve en el ejemplo siguiente:
deb http://ftp.es.debian.org/debian/ jessie main contrib non-free
Antes de instalar el programa álbum, debemos actualizar los repositorios y posteriormente ya tendremos disponible nuestro paquete para instalarlo a través de la herramienta apt:
# apt-get update
# apt-get install album
Para crear una galería HTML es tan sencillo como ejecutar "album" desde el directorio donde tenemos las fotografías, en mi caso las fotografías para este primer ejemplo están en /reflex y el fichero index.html y las miniaturas (thumbnails) se generarán automáticamente. Se creará por defecto un directorio llamado tn donde se guardarán las miniaturas (thumbnails):
 Ejecutando álbum por defecto
El aspecto que tiene la galería de fotografías por defecto se puede ver en la siguiente imagen. Podemos visualizar la galería haciendo click en el fichero index.html ó subiendo el contenido a un servidor web como se puede ver en la siguiente ilustración y visitando la dirección URL:
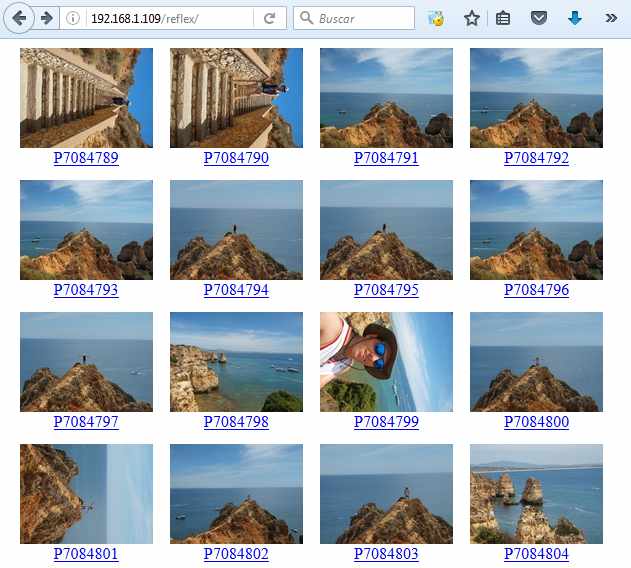 Galería por defecto de album
Si queremos personalizar la galería, tenemos muchas opciones las cuales podemos acceder desde la ayuda con "album -h". Por ejemplo en el siguiente ejemplo voy a personalizar la galería poniendo el idioma en inglés, limpiaré las miniaturas no usadas y usaré el theme Stamp. Para no tener problemas, recomiendo copiar el theme al directorio del album previamente. Para ello ejecutaremos los siguientes pasos:
# cp -R /usr/share/album/themes/Stamp/ /var/www/reflex/
# root@ns:/var/www/reflex# album -lang es -clean -dir miniaturas -theme /usr/share/album/themes/Stamp/
Los diferentes themes que podemos usar está en el directorio /usr/share/album/themes/:
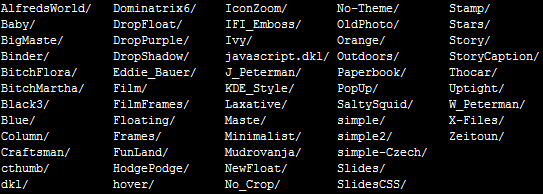 Listado de themes
El nuevo álbum utilizando la configuración anterior y usando el theme Stamp queda de la siguiente forma:
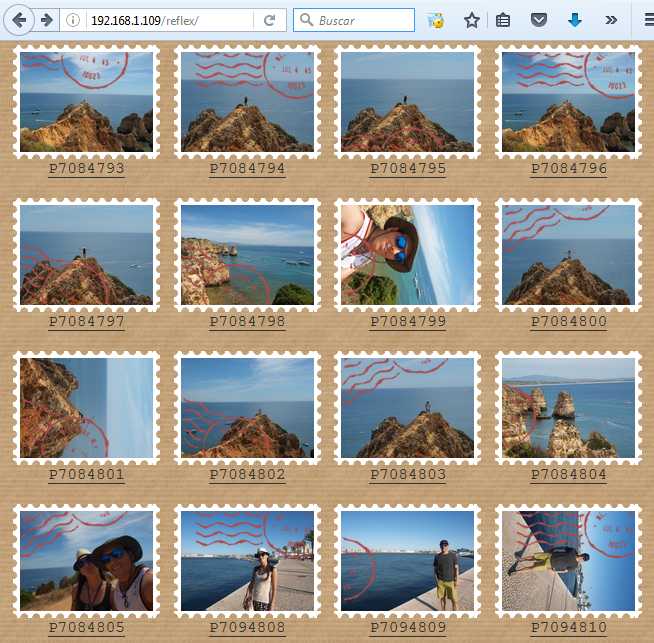 Galería con Theme Stamp
Las opciones de álbum son las siguientes y podemos consultarlas con la opción "album -h":
Read conf: /etc/album.conf

This is album v4.13 on linux


Usage:    album [-d] [--scale_opts .. --] [options]
Makes a photo album
All boolean options can be turned off with '-no_'
(Some are default on, defaults shown in [brackets])
-h Show usage
-more To show more options.
-lang
-conf
-version Display program version info
-mv Move imgs across albums: see 'album -plugin_info utils/mv'
Album Options:
-medium
-slideshow Slideshow capabilities (only with some themes) [OFF]
-embed Use image pages for non-picture image pages [ON]
-clean Remove unused thumbnails [OFF]
-caption_edit Add comment tags so that caption_edit.cgi will work [OFF]
--exif
Example: -exif "
Camera: %Camera model%"
If any %keys% are not found by jhead, nothing is appended.
--add Add a new directory to the album it's been placed in
-burn Setup an album to burn to CD
Implies '-index index.html' and '-no_theme_url' [OFF]
Thumbnail Options:
-geometry
-type Thumbnail type (gif, jpg, tiff,...) [jpg]
-medium_type Medium type (default is same type as full image)
-crop Crop the image to fit thumbnail size
otherwise aspect will be maintained [OFF]
-dir Thumbnail directory [tn]
-animated_gifs Take first frame of animated gifs (only some systems) [OFF]
Plugin and Theme Options:
--data_path Path for themes, plugins, language files, etc...
[/etc/album /usr/share/album /root/.album]
-plugin
-plugin_usage
-theme Specify a theme directory
Dashdash options (--opt) can be specified two ways:
With one argument: '-exif hi -exif there'
With mult. arguments: '--exif hi there --'
Copyright: (c) 2000-2008 David Ljung Madison
Docs: http://MarginalHacks.com/Hacks/album/
Please see: http://MarginalHacks.com/Pay/
License: http://MarginalHacks.com/License/
% album -license
3.- INSTALACIÓN DE PHOTON
La instalación del programa generador de galerías HTML de fotos es sumamente sencilla. Solamente debemos actualizar nuestro repositorio de paquetes para descargar la última actualización y luego instalar el programa. Debemos hacerlo como usuario root o con un usuario que tenga permisos de sudo:
# apt-get update
# apt-get install photon
La forma básica de generar una galería con los parámetros pro defecto es "photon -o /directorio_destino/ /directorio_fotos/"
# photon -o /var/www/reflex_gallery/ /var/www/reflex/
Mis fotos están realizadas con una cámara reflex Olympus E-520 y al parecer la generación de la galería fallaba por problemas con la información EXIF de las fotos. Si te sucede lo mismo, añade la opción "-E" para deshabilitar la función del análisis de la información EXIF:
# photon -E -o /var/www/reflex_gallery/ /var/www/reflex/
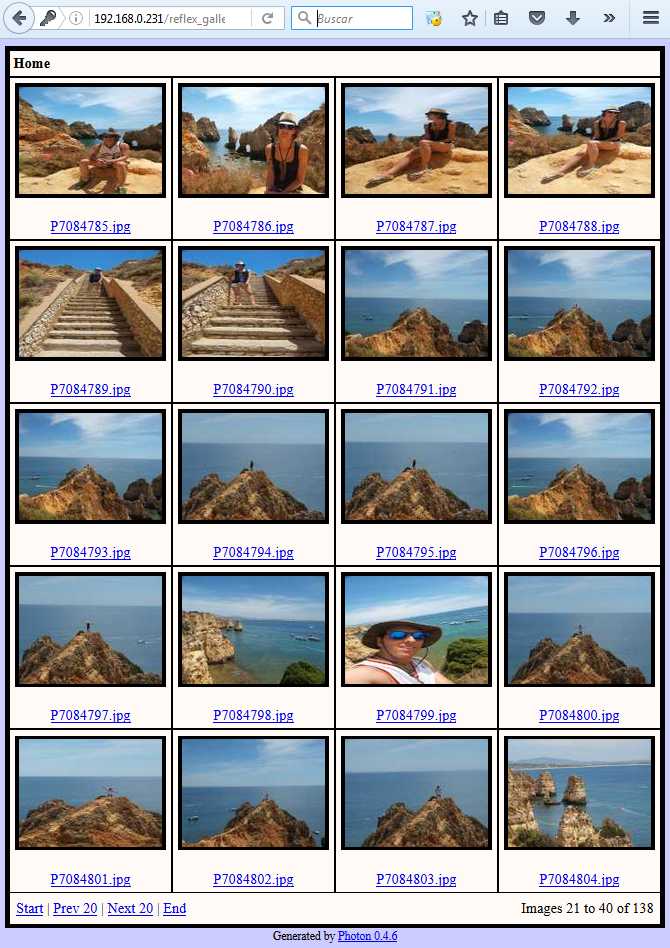 Galería por defecto con photon
Por defecto, photon nos genera 3 fotografías en diferentes calidades por cada fotografía original. Esto podemos cambiarlo desde las opciones de photon:
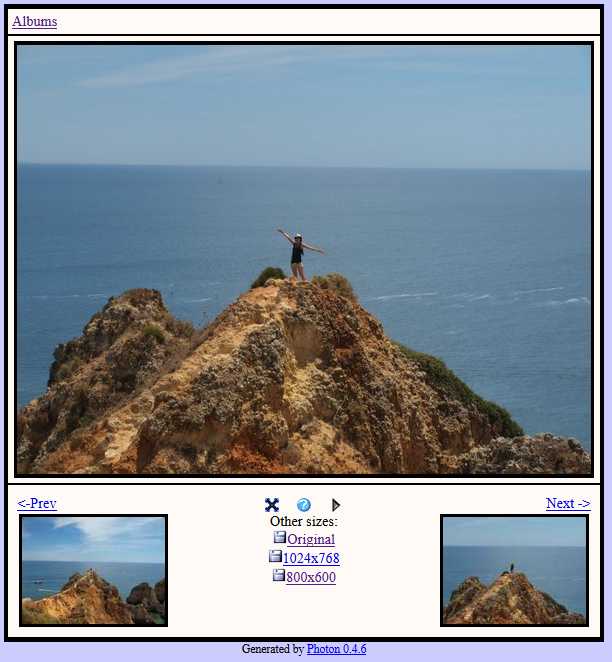 Visualizando una fotografía
Podemos ver todas las opciones disponibles con "photon --help" ó en la página de ayuda del man, "man photon".
Usage: photon [OPTION]... [PATH]...

Options:
  -a      --awstats               Insert Javascript for Awstats
          --awstats-url=URL       Change default value for Awstats script url
  -c NAME --comment               Name of the comment file (default .comments)
  -d NUM  --display-columns=NUM   Number of columns in index (default 3)
  -E      --no-exif               Don't include EXIF information in HTML file
  -f      --force                 Overwrite non-image generated files (html, javascript, etc) (default no)
  -ff     --force --force         Overwrite image files (default no)
  -h      --help                  Print this help
  -I      --no-index              Do not generate the high level index.html
  -J      --no-javascript         Do not use javascript (no shortcuts, ... )
  -k      --skin=THEME            Skin selector (default photonv1)
          --print-skins           Print the list of available skins (not implemented)
  -l NUM  --display-lines=NUM     Number of lines in index (default 5)
  -m      --movie                 Movie mode, include link to movie (*.mov)
  -o NAME --output-directory=NAME Name of the output directory
  -s LIST --sizelist=LIST         Image sizes (default 0,1024x768,800x600,640x480)
                                  0 is special case to specified the original resolution
                                  wxh specify the width and the height in pixel of the image
  -t SIZE --thumbsize=SIZE        Size of thumbnails (default 160x120)
  -V      --version               Print Photon version
  -v      --verbose               Be verbose
  -z      --compress              Compress the original image if selected (default copy the image)
          --exif-bordercolor=COLOR  Exif window border color (default #008000)
          --exif-bgcolor=COLOR    Exif window background color (default #f0fff0)
          --exif-fgcolor=COLOR    Exif window text color (default 'black')
          --body-bgcolor=COLOR    Body background color (default #ccccff)
          --img-bgcolor=COLOR     Image background color (default 'white')
          --exclude=PATTERN       Exclude files matching PATTERN
          --resize-plugin=PLUG    Program use to create thumbnails
                                     internal: fastest method (default)
                                     gimp: use Gimp>1.x (better quality)
                                     magick: use ImageMagick (not implemented)
          --resize-quality-low=Q  quality for small image. 0 (bad) and 100 (good)
          --resize-quality-high=Q quality for big image 0 (bad) and 100 (good)
          --gimp-program=PROG     use PROG for gimp


Shortcuts while viewing an image:
  n/SPACE     Go to the next image (with the same resolution)
  p/BACKSPACE Go to the previous image (with the same resolution)
  s           Start/Stop the slideshow
  +/-         Increase/Decrease by one second the slideshow's period
  h           Show shortcut and help
  i           Show Exif information
  z           Change to the higher resolution [NOT YET IMPLEMENTED]
4.- INSTALACIÓN DE BINS
La página oficial del proyecto es http://bins.sautret.org/ y en ella podremos multitud de ejemplos, configuraciones, screenshots y toda la documentación de ayuda del programa. Para instalar bins, podemos hacerlo directamente desde APT. Como siempre, con usuario root o con sudo ejecutaremos los siguientes comandos:
# apt-get update
# apt-get install bins
Para generar una galería de fotos, el comando es muy similar al de photon, "bins /directorio_fotografias/ /nuevo_directorio/" pero en el caso de bins ,el directorio destino debe de existir previamente ya que no lo crea automáticamente:
# mkdir /var/www/gallery_reflex/
# bins /var/www/reflex/ /var/www/gallery_reflex/
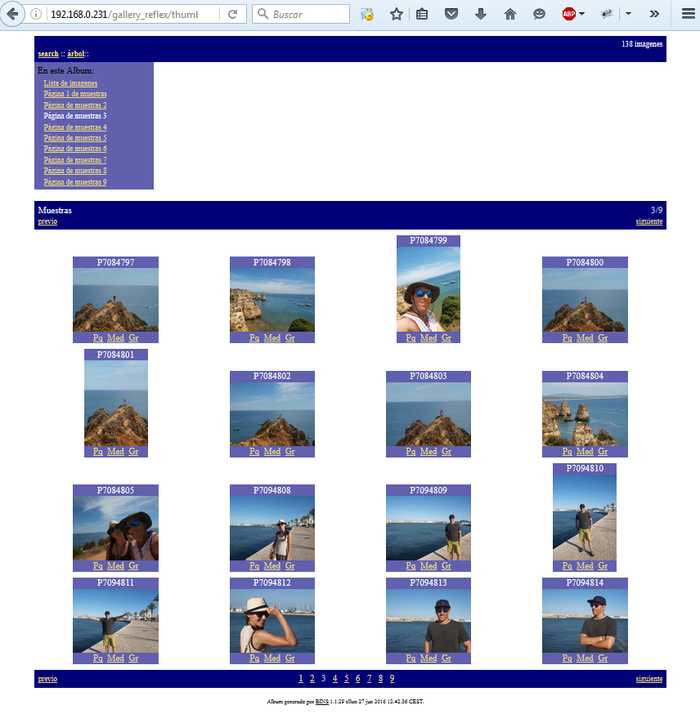 Galería por defecto con Bins
Por defecto, bins nos genera 3 fotografías en diferentes calidades por cada fotografía original. Esto podemos cambiarlo desde las opciones de bins:
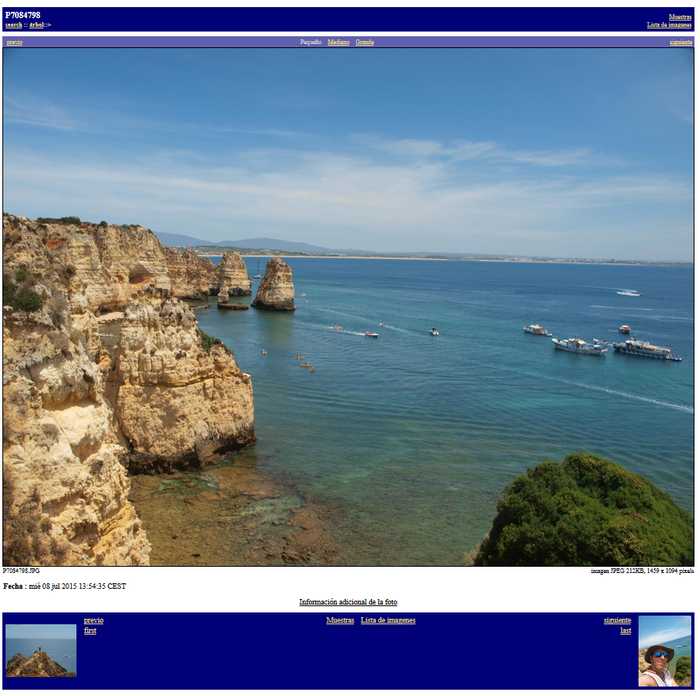 Visualizando una fotografía
Las opciones de bins son las siguientes:
BINS Photo Album 1.1.29 (http://bins.sautret.org/)
Copyright © 2001-2004 Jérôme Sautret (Esta dirección de correo electrónico está siendo protegida contra los robots de spam. Necesita tener JavaScript habilitado para poder verlo.)
Some parts of code:
Copyright © 2000 Brendan McMahan (Esta dirección de correo electrónico está siendo protegida contra los robots de spam. Necesita tener JavaScript habilitado para poder verlo.)
Copyright © John Moose (Esta dirección de correo electrónico está siendo protegida contra los robots de spam. Necesita tener JavaScript habilitado para poder verlo.)
This is free software with ABSOLUTELY NO WARRANTY.
See COPYING file for details.
bins [options] source_dir target_dir
options are:
-f config_file use an alternative configuration file, instead of
~/.bins/binsrc
-o [STR] Tells script to use only one copy of image using
html size specs (height, width specs in the image
tag) for scaled versions (instead of generating
several images, one for each size).
Default is false.
STR is an optional argument to set how the one image
is generated.
Possible values:
"scaled" (make scaled copy of orig in target_dir
hierarchy, sized to max size). Default.
"copied" (copy orig to web dir)
"custom" (use copy if filesize 1 Mb
resize, resave, if bigger than 1 Mb)
-d STR Determine if tags found in Exif structure are
added in desc files.
STR is one of "always", "never" or "exist"
("exist" only adds if the desc file already exist.)
Default is always.
-c color_style Color style to use. Can be blue (default one), green,
ivory and pink or any other one defined in config/desc
files.
-s style Template style to use (the only styles provided for now
are 'default' 'joi' and 'satyap').
-t template_dir Specify location of html templates.
Default is ~/.bins, falling back
to default versions in /etc/bins/templates."style".
-p Numbers preceding the album title, followed by
an underscore are stripped.
If this option is given, then prefix ordering
numbers on directories are removed. For example,
if one has directories may, june, and august, they
can be renamed 0_may, 1_june, and 2_august and
they will appear in the album in the correct
order.
-r type Reverse sorting order. 'type' can be 'dirs', 'pictures'
or 'dirs,pictures'
-e Tells the script to generate an editable version
of the album. If set, some more links and icons
are added to directly access the .xml files for
editing. This is for editing purposes, not for a
final album.
-i iKey,iKey,... Sets "ignore" keywords which will be compared against
the contents of the "ignore" field of the album's
XML file, in the
section. If any of the iKeys match those in the
album's "ignore" field, that album will not be
processed. See also the ignore parameter.
-n iKey,iKey,... Sets "hidden" keywords which will be compared against
the contents of the "ignore" field of the album's
XML file, in the
section. If any of the iKeys match those in the
album's "ignore" field, that album will not be
linked anywhere. See also the hidden parameter.
-v X X is the verbosity level (between 0 and 3)
-h print this help message
5.- ¿Y CUÁL DE ELLOS ELEGIR?
Personalmente, me gustan los 3 programas casi por igual, pero posiblemente bins sea mi preferido porque lo he usado durante más de 10 años. Lo mejor que puedes hacer es instalar los 3, probarlos con algunas fotografías y ver cuál de ellos cumple todos tus requisitos.
ENJOY!


 Login con Google
 Login con Microsoft
 Login con GitHub